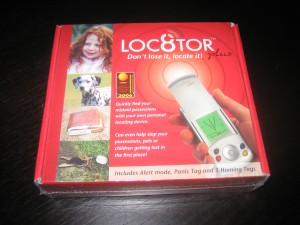
So many people have been asking me on the RFID Toys forum for a way to use RFID to locate things. I’ve always told them two things: 1) RFID is an identifying technology, not a tracking technology… and 2) Check out the Loc8tor, a simple RFID based direction and range finding solution… but I’d never got my hands on one to try it out for myself, until now. You can find a few different versions of the Loc8tor on Amazon, but the specific unit I’m using here is the Loc8tor Plus.
I won’t bother with a basic review, that has already been done quite well by the people over at GPS Magazine (which I find funny because it’s typical for a layman to think of RFID as some kind of GPS satellite tracking hocus pocus magic). Read their great review here (PDF)
This is the all important “Conclusion” section of their review, which I think hit the nail right on the head:
Using the Loc8tor is like playing an electronic game of Marco Polo. Audible beeping sounds let you know whether you’re getting hotter or colder, as you move about trying to zero in on the missing Tag. There’s no direction indicator on the handheld, so you’ll have to go through a process of elimination, turning in circles and moving in various directions until the signal strength increases and the beeping noise speeds up.
The Loc8tor handheld unit feels cheaply made — one good drop and the lightweight plastic will almost certainly shatter. Worse, there’s no labels on any of the buttons to let you know what function each button performs. I did appreciate the ultra-small size of Loc8tor’s homing tags, as well as the longer-than-average battery life (2-9 months, depending on usage).
It can be somewhat frustrating (and time consuming) hunting down a tag, but it does work eventually for stationary objects such as keys, wallets, etc. However, the Loc8tor Plus system isn’t accurate enough for use on people or pets, as it takes too much time to hone in on a missing tag while you search room to room and listen for the faster/slower beeping tone.
Tracking down a stationary object is difficult, but possible with Loc8tor. Tracking down a moving target is mission impossible — especially without the benefit of an arrow or some other idicator pointing you in the right direction.
You definitely wouldn’t want to use Loc8tor to find a missing child at a supermarket or shopping mall. But if you’re always misplacing your keys or wallet (or anything else that will remain stationary while you look for it) at home, and don’t mind a slow, sonar-like room to room search, Loc8tor will help you track it down. For tracking pets and people, you’re better off looking elsewhere.
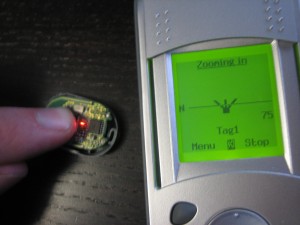
One interesting thing I noticed is the tags themselves have feedback, with a blinking light and a noisy speaker that chirps when you are trying to locate the tag. This is great when used for it’s intended purpose… locating lost keys or something. But I wanted to use this system for another purpose, one which wouldn’t necessarily benefit from a flashing, beeping tag… finding my stuff if/when it gets stolen.
Permanent tagging
Because the tags have such a limited lifespan, you don’t want to tag like 20 things and then keep a rigorous battery replacement schedule. Chances are pretty high you’ll forget once and the battery will die, then immediately thereafter the tagged item will be stolen. I don’t know about you, but most things I own that I want to track down are electronic by nature… or at least have some sort of battery power built into them that is vital for the device’s operation. Things like cell phones, laptops, motorcycles, and cars come to mind.
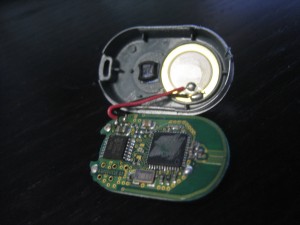
One great thing about the tag is once you get rid of the plastic housing, the speaker, and the batteries, the tag board is very thin. Something this small and thin would be easy to integrate into just about anything.
Cracking open a tag
With the batteries removed and the tag board exhumed from it’s plastic coffin, you can see how easy it will be to insert this small board into items like laptops and such. You can also see the integrated antenna starting on the right side of the board and wrapping around the board perimeter.
The tag and receiver use a proprietary air interface (data protocol), and operate on the 2.45GHz band. For those of you who feel daring, you could cut/gouge the antenna leads on the tag board and try coming up with a straight full wave dipole antenna to see if you could enhance the range of the system. Unless my math is wrong (which it very well could be), the full wavelength of 2.45GHz is about 12.245 centimeters. Minus 5% for velocity factor, makes each leg of a 2.45GHz full wave dipole antenna about 2.9 centimeters long, which is close to the size of the antennas on the tag board. The only thing that might be impeding performance is the fact that the integrated antenna on the tag board is wrapped around the board’s perimeter. A straight dipole antenna, like the one in the receiver, might perform better. However, I wouldn’t suggest altering the antenna… usually these things are designed to perform at their best ability and rolling your own usually results in decreased performance. I especially wouldn’t mess with the receiver antenna… it has some passive elements on the underside of the plastic slide-up lid that assist with direction finding, and messing with that messes with the entire point of the receiver.
The first thing you want to do is remove the speaker from the tag board. The tag beeps and flashes a red surface mount LED when being located, which is great for the intended purpose of finding your keys… but you don’t want the stolen merchandise giving away the fact that you’re tracking down the rats who stole it with a bunch of high pitched beeping. With the speaker and housing removed, the tag still works like a charm.
A few details not covered in the review
Just like I always say in the RFID Toys forum, tag orientation is very important. After doing some basic testing, I found that the best orientation for the tag is horizontal. A vertical tag will greatly reduce the range that the receiver will be able to pick up the tag. But, I guess the important thing really is to have the tag and the receiver on the same plane, so if you are using this system to track down something at the bottom of a giant well (a rare time when your receiver orientation would be perpendicular to the earth) then your tag should be placed vertically. This makes me wonder about just how well this tag system will work with pets if the tag will be hanging down (vertically) from the pet’s collar. I’m sure it will still work, but not at the full range advertised on the box (600 feet). Truthfully, even with a tag placed horizontally on my all wood front porch, I get about 1/3 that range (200 feet).
Because we’re dealing with a very weak signal in the 2.45GHz band, metal plays a big role in interfering with the tag’s signal. Putting anything metallic close to or even anywhere between the tag and the receiver will interfere with read range. A simple bench test showed this… I placed the receiver at one end of my 8 foot wooden workbench, and a tag at the other. With the bench cleared, I got a great signal from the tag, but as I started adding metallic objects to the bench, the signal got noticeably worse. The worst interference I could induce came from placing a metallic object directly next to or under the tag, so affixing a tag to a metal object will greatly reduce the range of the tag.
In the review, they describe the 2-8 month (depending on usage) expected battery life for a tag as “excellent”, which I is horrible compared to most active RFID tags which have a tag life of anywhere between 1 to 5 years. On the bright side though, these tags are smaller than many active RFID tags and they have user replaceable batteries.
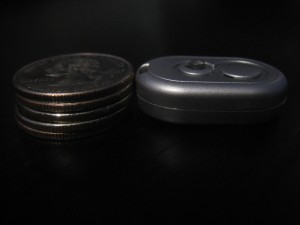
Another thing noted in the review is that the tags are very small. Sure they are as small as the batteries inside will let them be, but they will still look and feel pretty bulky when affixed to most items, and I really don’t see how you’re supposed to stuff one of these things into your wallet.
In fact, with orientation issues, metallic interference, and tag battery life being what they are, I can see issues with all the advertised uses displayed on the front of the Loc8tor box. For my purposes though, I can plan around or completely sidestep these issues.
The final issue I ran into with this system that was not covered in any reviews was the fact that when each Loc8tor reader device registers the tag in it’s inventory, the tag also pairs itself to the reader device. That means two things; 1) Each tag can only be added to a single reader’s inventory. This means a mother and father, each with their own Loc8tor reader, cannot add a child’s tag to both readers. 2) If your reader is lost or broken, the tags paired to that reader are worthless as they will not register to another reader and I have not found any way to clear these tags so they can be paired up with a new reader. I’d say that’s a pretty big issue. It’s obvious this was done for security purposes, however I think they could have added a button on the tag that when pressed would allow an additional reader to register the tag.
Permanently embedding the tag
The tag uses a PIC 16F636 (the smaller IC) which has a specific operational voltage range depending on the frequency of the clock being used. Even though I tested a tag running at 5v from a regulated power supply for 48 hours with no apparent loss in signal quality, I figured I would do well to get my hands on a 3v voltage regulator so I ordered a few samples.
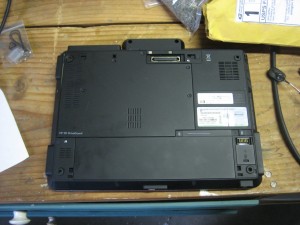
The first thing I wanted to tag was my tablet PC. The industry is trying to move away from that term, but it still describes a certain class of notebooks with a pivoting screen and ultra-thin design. My HP 2710p is no exception. Stuffing a tag into this thing should prove to be interesting, but if it can be done on this thin of a notebook, it should be a snap to embed one of these tags into any standard laptop or notebook.
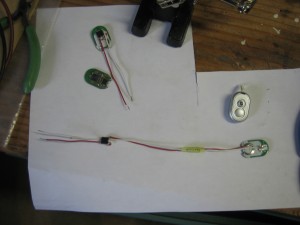
To be able to get a tag into the notebook, I need to protect the tag circuitry and 3v regulator. My first idea was to piggyback the 3v regulator onto the tag itself, however that proved to introduce too much interference and the range of this modified tag was drastically reduced. So I opted to put the 3v regulator in-line with the power supply leads.
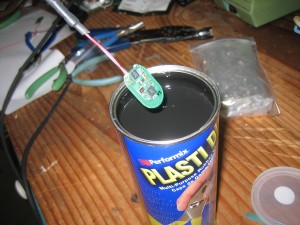
To protect and insulate the tag itself, I turned to my old friend PlastiDip. It comes it two forms, spray and dip. Both application methods have their uses, but for this type of application nothing beats the dip.
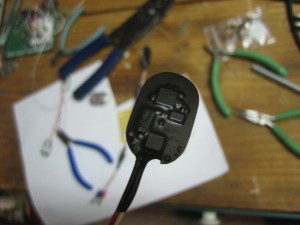
After one coat it looks pretty cool, but the rubber is thin. I always double dip for added protection.
Different tag board revisions yield different results
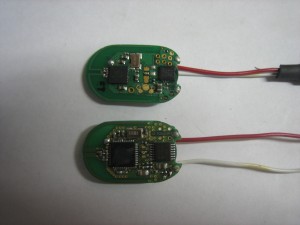
After opening up all the tags I received with the Loc8tor Plus receiver, I started playing with the two tags that come in the Loc8tor mini homing tag 2-pack and immediately noticed something strange. The 2-pack tags were different than the ones that came with the receiver. It turns out the tags that came in the 2-pack “look” older, but the opposite may actually be true. After opening and testing several tags of both types, the tags that came in the 2-pack seem to be a better board revision because there are less parts on the board and the tag’s range is noticeably better. In the picture below, the tag on top is from the 2-pack and the tag below it came with the receiver.
After discovering this, I ordered 2 more packs so I’d have a total of 6 “good” tags. I wanted to put one of these longer range tags in my tablet PC so I fitted one with 3v in-line regulator and rubberized it in preparation for installation.
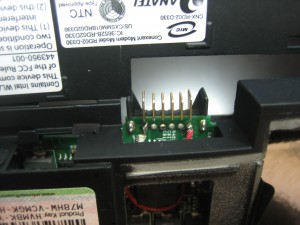
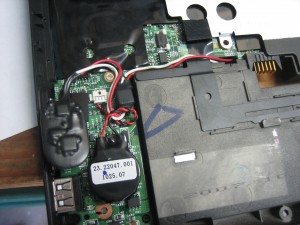
Unfortunately I got too excited and forgot to take pictures of the disassembly process. I basically took apart the tablet and searched for a void I could squish the tag into. Luckily I found a spot that was just about perfect. The tablet’s CMOS battery is located just under the palm of your left palm when typing on the tablet’s keyboard, and I figured I could jam the tag right next to it. That location is also very close to the Li-ion battery terminals. After sizing up the tag’s location, I soldered the power supply leads to the battery terminals of the laptop. Even if the laptop battery is dead as a doornail, as long as it’s in the laptop it should still have enough current available to power the Loca8tor tag, which perfectly illustrates the beauty of embedding the tag into a battery powered device.
Before I closed it up, I did some testing. I was able to stand in the parking lot and track down my tablet PC sitting at my desk in my office at work.
I then placed the tablet PC in my car and tested range. Being in the car reduced the range a bit, but I could still get a signal and track it down from a reasonable distance.
– update –
After closing up the 2710p I did more testing. Having the notebook powered up and connected via 802.11g wifi doesn’t seem to affect performance of the tag, which is good. I was worried that the 2.45GHz Loc8tor tag would get a lot of interference from the built in wifi, but that doesn’t appear to be the case at all.






[…] From time to time I get email from parents asking me if I knew of any device they could tag their kids with that would alert them if the kid started to wander off. I always figured something like that existed, but I never had a chance to play with anything like that until I came across the Loc8tor. […]
i find your article very interesting. my problem is battery theft from my tractors on the farm . it is mainly the local wokers within a 5 km radius who are responsible for this.they steal the batteries for their private cars and it should be quite easy to hunt it down if you can find a way to conceal your device in a car battery.
Hmm yeah, you could make a fake plastic battery topper or something that could conseal the very small transmitter. You’ll need access to both battery posts (for power) and a 3v regulator to drop the 12v down to 3v for use by the transmitter.